
Have you ever fantasized about eating bell peppers that you grew yourself, which are brimming with taste and just outside your door? In an unexpected turn of events, bell peppers, adaptable cooking mainstays, are surprisingly well-suited for cultivation in containers.
This indicates that even those living in urban areas with limited space may produce their little pepper paradise on balconies, patios, or even inside locations that get enough sunlight.
This blog post will teach you to turn buckets into thriving bell pepper havens, producing a tasty and colourful harvest.
Also Read: 15 Best Vegetables to Grow for Survival
Grow Buckets Full of Bell Peppers at Home

Please follow the tips below to grow bell peppers on your lawn, kitchen, or garden. Please read in full length!
i). Best Bell Pepper Variety
• Size Matters:
Don’t have a big garden? Choose tiny or compact types, such as “Lunchbox” or “Sweet Bite,” for smaller boxes. Regular-sized options like “Bell Boy” or “California Wonder” work best for bigger ones.
• Maturity is essential:
Look at the “days to maturity” list on seed packs. For shorter growth seasons, types that ripen early, like “Early Sweet,” are great.
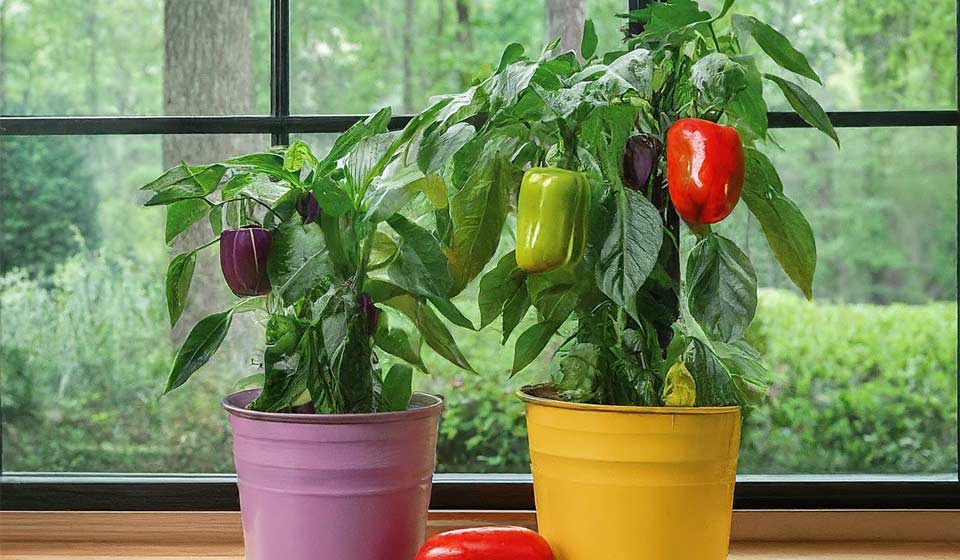
• A Rainbow of Choices:
Bell peppers come in a wide range of bright colours, from the classic red to the sunny yellow to the crisp green to the enticing purple and chocolate. Choose based on what you like to eat and how it looks!
Also Read: How to Grow Tomatoes at Home in Pots (Full Detail)
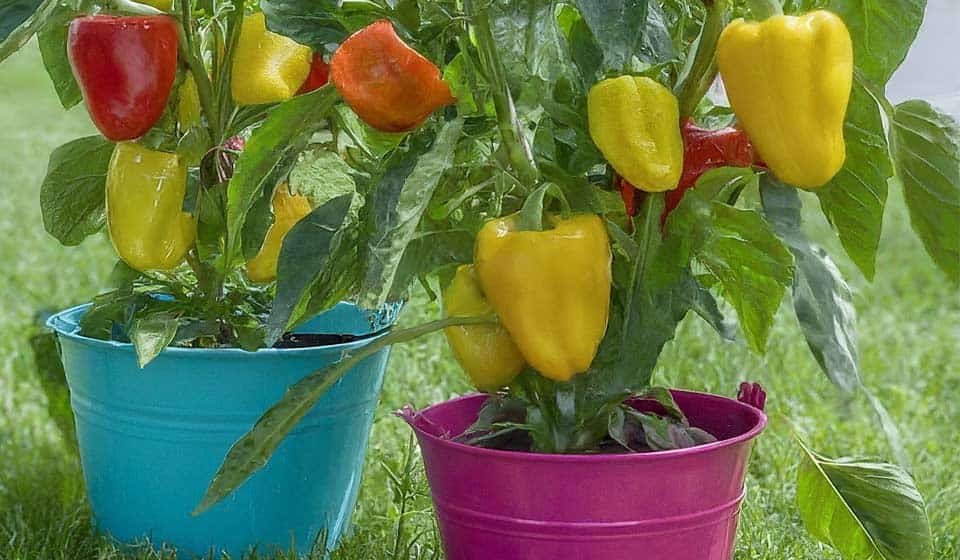
ii). Selection Of Buckets
• Size is King:
you should use at least a 5-gallon bucket. Choose even bigger buckets (up to 10 gallons) if you want to grow more plants or more significant types.
• Drainage is Very Important:
Drainage holes are needed to keep the ground from getting too wet. Make sure they’re in your bucket, or drill some yourself.
iii). Preparation of Bucket Palace
• Cleanliness is essential.
Use warm, soapy water to wash your bucket well and remove any dirt or other things that could house bugs or diseases. Rinse it well and let it dry all the way before you use it.
• Selection of Suitable Soil
High-Quality Mix: Use a high-quality potting mix that drains well and is made especially for veggies or pots. Garden dirt shouldn’t be used because it can be too thick and hold too much water.
Organic Choice: If you want to be better for the environment and maybe get more plants, choose organic planting mixes.
Changes to the Mix (Optional):
• Nutrient Boost: To give your plants an extra growth boost, add slow-release organic fertilizer or ground manure according to the directions on the box. Before planting, mix it well with the potting mix.
Also Read: How To Make Well-drained Soil For Indoor Plants
iv). How to Plant Your Bell Pepper Seeds or Seedlings
For proper plantation of bell pepper seeds or seedlings please follow the tips below. Please don’t skip!
a). Starting from Seeds
• When to Plant Seeds: Plant seeds indoors 6 to 8 weeks before the last frost date in your area.
• Seeding Depth: If you want to plant seeds, put them about ¼ inch deep in small pots or individual seed starting trays that have been wet with planting mix.
• Light and warmth: Keep the area warm (around 70–80°F) and give the plants enough light (14–16 hours a day, if needed).
• Watering Smartly: Ensure the dirt is always damp but not soaked. To keep the seeds from getting damaged, use a spray bottle.
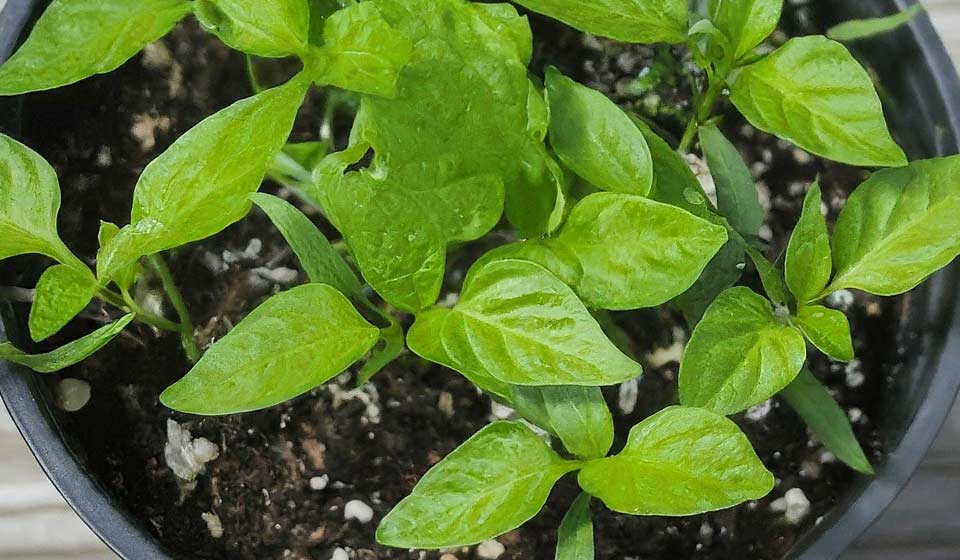
• Germination Magic: It should take seeds one to two weeks to sprout. Seedlings are ready to be moved when they get their first true leaves, which are the leaves that grow above the first cotyledons.
Also Read: How to Propagate Pomegranate from Cutting
b). Transplanting Seedlings
• Time to Move On: It’s time to move on. Give your plants a week of gradually exposing them to outdoor conditions before moving them into your pots.
• Transplanting Technique: To transplant, carefully remove the plants from their starter pots to not upset the roots too much.
• Planting Depth: Put the plants in the ground at the same depth they grew in their starter pots. You should leave about an inch of room around the edge of the bucket to water it.
• Giving your plants support: For more extensive types, you might want to use a stick or tomato cage to keep them upright as they grow.
v). Taking Care of Your Bell Pepper Plants
• Sunshine is life: Put your bell pepper buckets somewhere sunny where they will get at least 6 to 8 hours of sunshine daily. This is very important for good growth and lots of fruit.
• Consistent Moisture: When you water your bell pepper plants, ensure the soil stays wet but not soaked. Put a lot of water in the pot until the holes in the bottom drain.
• Frequency Adjustment: The amount of watering will rely on the environment (plants need to be watered more often when it’s hot), the size of the pot (bigger pots keep water in longer), and the plant’s age (younger plants need to be watered more often when they’re still young).
Do the “finger test” by putting your finger in the ground near the plant’s base. It’s time to water if the top inch feels dry and warm.
• Fueling Their Growth: Once your plants have become established, which should take about 4 to 6 weeks after being moved, it’s time to use fertilizer to bring out their full flowering potential. Here is more information about this critical step:
Also Read: Best Tips To Grow Sweet Potatoes In Containers
vi). How to Pick the Right Fertilizer:
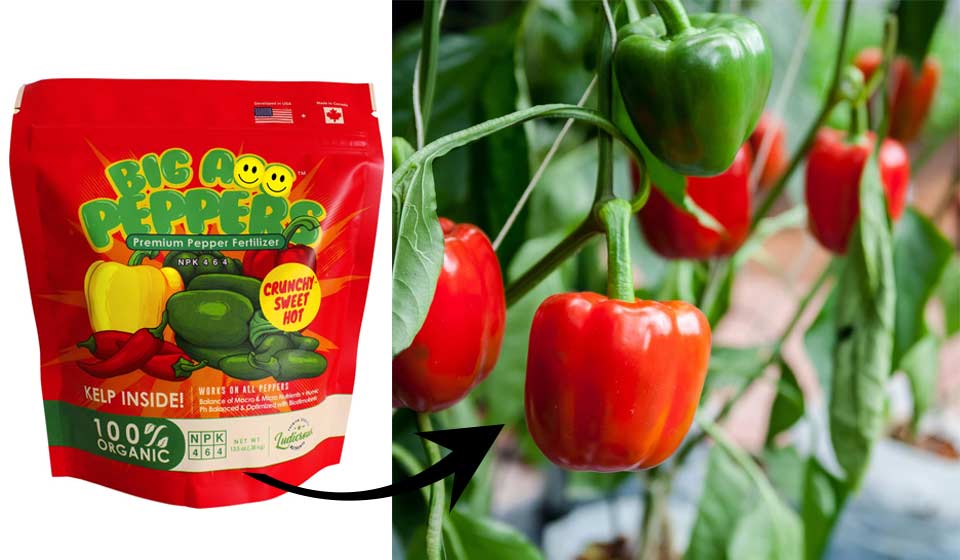
Choose a balanced fertilizer made just for veggies if you want to be successful. Usually, these fertilizers have nitrogen (N), phosphorus (P), and potassium (K), which are the three macronutrients plants need to grow.
Understanding NPK
• Nitrogen (N): It is essential for leaf growth during the growing stage. However, too much nitrogen can cause plants to grow too many leaves, stopping them from making flowers and fruits.
• Phosphorus (P): Helps roots grow strong and flowers bloom, which are necessary for fruiting.
• Potassium (K): Helps plants stay healthy, make food that tastes good, and fight sickness.
Try to find a balanced fertilizer with an NPK ratio close to 10-10-10. This means the fertilizer has the same amount of nitrogen, phosphorus, and potassium, which is good for bell pepper growth.
Here is a list of some NPK types and how well they work with bell peppers:
More nitrogen (for example, 5-10-10): You should use this fertilizer at the start, when the plant is still young, to help the leaves thrive. But once blooming starts, switch to a balanced 10-10-10.
More phosphorus, like 10-20-10: During the blooming and fruiting stages, this can be helpful because it gives the flowers and fruits extra support for solid growth. Use sparingly, though, to avoid nutrition issues.
Organic Options
If you want to grow organically, you can use organic fertilizers like old dung tea, compost tea, or fish emulsion. These choices let nutrients out slowly and help plant life stay healthy. Remember that organic fertilizers may need to be used more often than manufactured ones.
Also Read: How To Store Potatoes For Long-Term Use
vii). Frequency and Application Tips
• Start slowly
Don’t fertilize your plants until they are established and have a few sets of true leaves. Follow the manufacturer’s guidelines for diluting the fertilizer. Because container gardening is more concentrated than growing in the ground, the fertilizer is often lighter than recommended for in-ground plants.
• Weekly or Bi-weekly Feeding
Apply the diluted fertilizer solution once or every other week during the busy growing and fruiting season. Change how often you do it based on how fast your plant grows and the fertilizer you use.
• Foliar Feeding (Optional)
To give plants a quick nutritional boost, you could mist the diluted fertilizer solution straight onto the leaves and feed them this way. That way, the leaves won’t get burned by the sun. Do this in the early morning or late evening.
• Pay Attention to Your Plants
Even though feeding them regularly is essential, don’t forget to check their health. If you see signs of a nutrient shortage, like leaves turning yellow or growth that stops, you may need to change the type of fertilizer, how much you use it, or how often you use it.
Remember: Remember that giving your plants too much fertilizer can hurt them. It can cause the plant to grow slowly, get leaf burn, and make fewer fruits. Always be safe than sorry, and follow the rules that have been set out.
By smartly using fertilizer, you can give your bell pepper plants the nutrients they need to grow well in their bucket home, which will eventually give you a massive harvest of tasty homegrown peppers.
Also Read: Pros & Cons of Container Gardening: A Comprehensive Guide
viii). Power of Pollination.
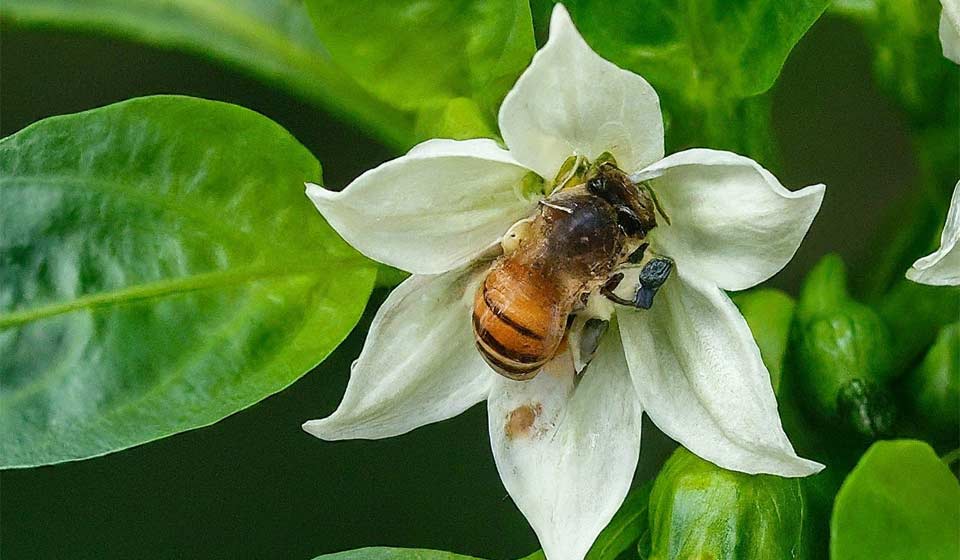
• Hand pollination may be needed to ensure bell peppers set fruit correctly if grown indoors or where insects don’t hang out. A simple way to do it is this:
• Use a small, soft swab to carefully move the pollen from the anthers (male flower parts) to the stigma (female flower parts). Usually, the male flower is smaller and has a stamen with sperm sacs. On the other hand, the female flower has a pistil with a sticky stigma in the middle.
• Do this to several flowers daily while they bloom to improve the chances of fruit set.
xi). Tips for Success
• Mulch Magic: Applying a layer of organic mulch around the base of your plants will keep the soil wet, bugs away, and the soil at the right temperature.
• Regular Pest Patrol: Look out for aphids, whiteflies, and pepper hornworms, among other things. If you must get rid of them, use natural ways like insecticidal soap or neem oil.
• Harvesting Happiness: When bell peppers reach their full size and colour, they are ready to be picked. To carefully cut the peppers off the stem, use pruners or scissors that are very sharp.
Also Read: Best 25 Essential Tools To Start A Kitchen Garden
Conclusion
Imagine going outside and picking a basket full of fresh, bright bell peppers as a prize for all your hard work. Each pepper shows how hard you worked and how well your urban gardening project went. You can soon enjoy these homemade treats in salads, stir-fries, and other favourite meals if you plan.
They have flavours miles ahead of anything you can buy in a store. Why wait, then? You can grow your pepper paradise in just a season if you follow the tips in this book. Get ready for the satisfying feeling of watching a seed grow into a fruit, and enjoy the tasty fruits and vegetables that your buckets can give you. Have fun growing!
Keep Reading
- How to Start a Kitchen Garden: A Comprehensive Guide
- Fast-Growing Vegetables in Pots
- Fastest Growing Vegetables: From Seed to Table in No Time
- Unearthing Expert Tips to Start a Garden From Scratch
- How to Make Money with Gardening
Recent Posts
In the interest of promoting health and preserving the environment, the idea of an indoor salad garden has gained popularity. This concept exemplifies the harmonious combination of culinary design...
Here, you will find different trellis to grow cucumber at home. The effort to domesticate cucumbers gives us trellising, an architectural and botany-inspired art form. This architectural wonder...